Employing Git with WordPress can be a time-saving measure, but in the past, it was common to use FTP to transfer plugins, themes, and even core updates to a remote server for testing. This method, however, had several drawbacks:
- Collaboration with a team can be difficult due to the potential for code overwrites
- The process is manual and time-consuming
- Lack of version control.
As a result, many developers are turning to Git-based version control for WordPress development, despite its challenges. In this article, we will discuss how to set up a pipeline in which pushing code to a Git repository (such as Github, Bitbucket, or Gitlab) automatically updates a website, making it ready for testing.
I have divided the article into 4 different sections (+1 bonus section):
- Create a GitHub repository
- Add the repository to your InstaWP account
- Link the repo to a site
- Link the repo to a template
- Bonus: Using GitHub Actions to automate your integration testing.
Let’s get started:
Create a Git Repository
(skip this step if you already have a Git repo setup).
To create a git repository, we can use GitHub or any other provider. For Github, follow these steps to create a new repository, or you can go to Github’s new repo directly:
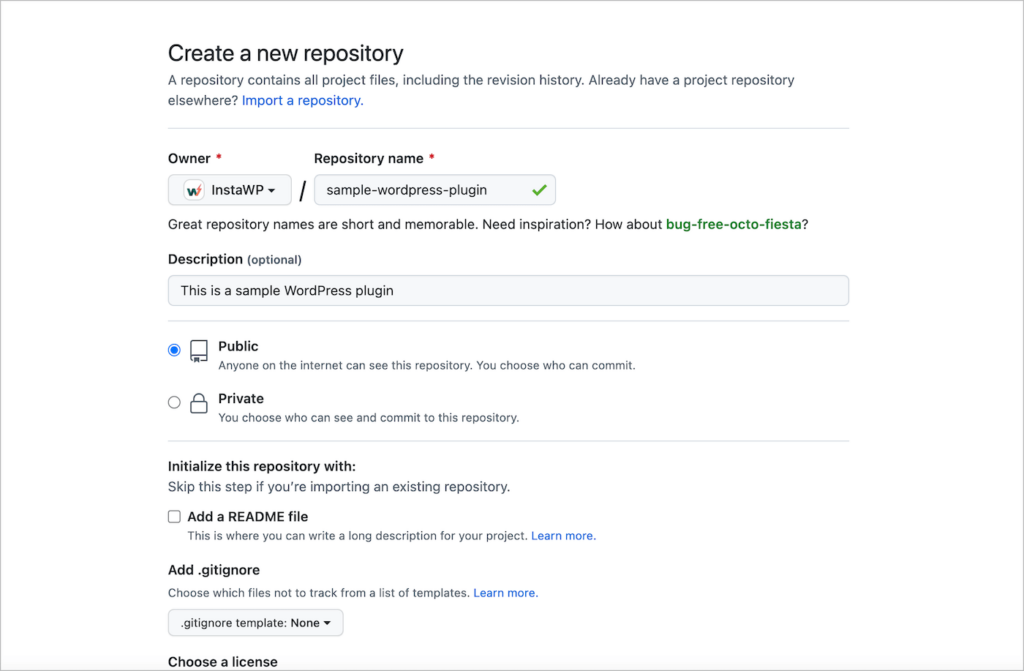
Then create a sample plugin as shown here (by creating a file plugin.php in the repo). Final outcome should look like this -> https://github.com/InstaWP/sample-wordpress-plugin
<?php
/*
Plugin Name: Hello World
Description: A simple "Hello World" plugin.
Author: Your Name
Version: 1.0
*/

function hello_world_display() {
  echo "Hello World!";
}

add_action( 'wp_footer', 'hello_world_display' );
Add Repo to InstaWP
Next, copy the URL of the repository and add it to your InstaWP account, under the Deployments tab:
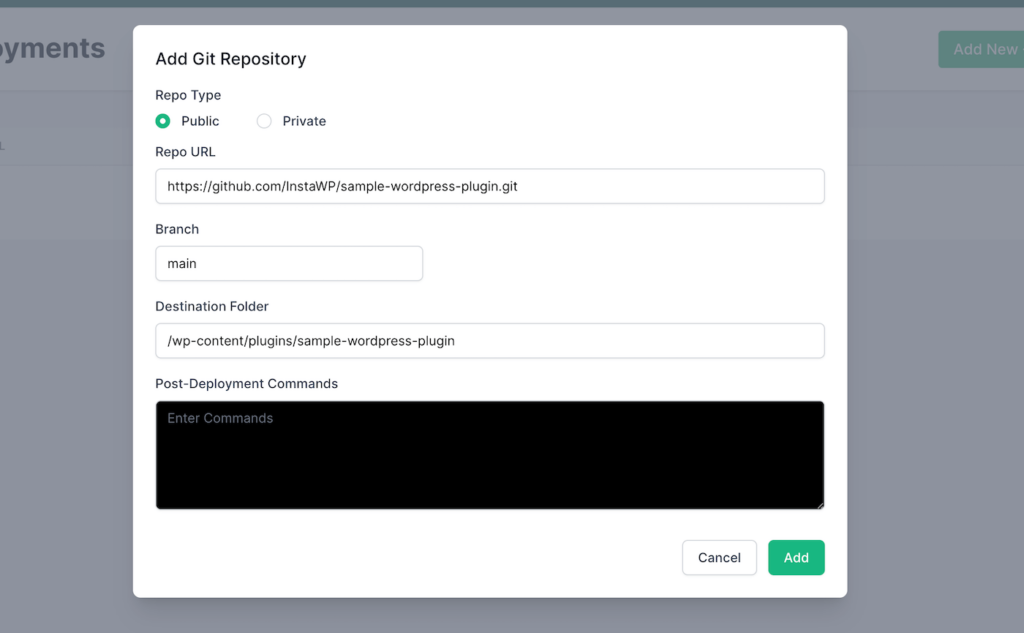
- Repo URL – Paste the Repo URL (if you are using Private repo, make sure to paste the SSH link, for example
git@github.com:InstaWP/sample-wordpress-plugin.git). - Branch – Provide the name of the branch you want to pull the changes from. (for example –
main) - Destination Folder – This is the location where the git repo will be cloned to. (for example –
/wp-content/plugins/sample-wordpress-plugin) - Post-Deployment Commands – You can choose to run commands after the git repo is cloned, for example –
composer, npm, wp clietc. (pro feature).
Click on Add to save the repo and it should show up in the Deployments list.
At this point you have two options:
- You can link this repo to a Site – so that any changes you make, appear immediately inside the site.
- You can link this repo to a Template – so that every time you make a change, InstaWP will spin up a new site based on the template and merge it with the code hosted on your git repo.
Let’s take a look at these options step by step.
Link the Repo to your Site
If you have not created a Site before, create a new WordPress site under the “Sites” tab. Once the site is created, click on the “…” menu and select “Deployments” from the menu.
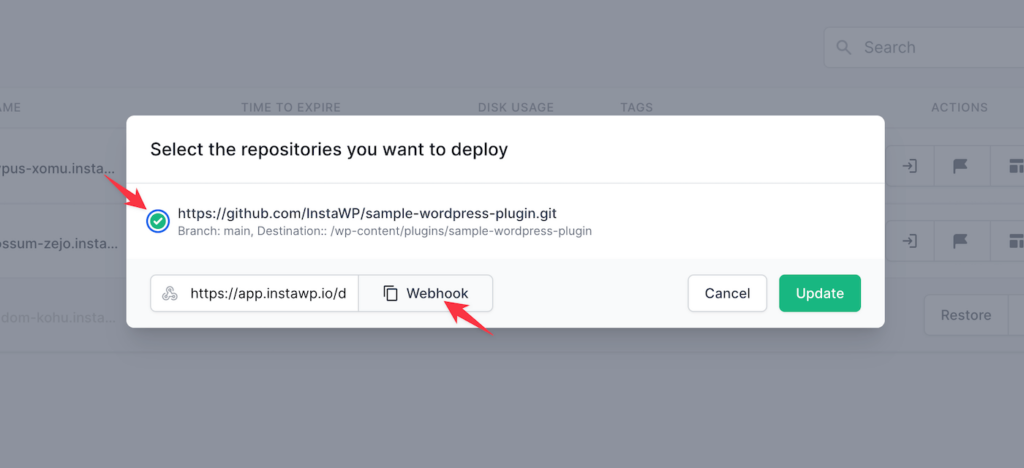
- Check the Repo from the list
- Copy the webhook URL (which will be used in the next step).
Next, open your GitHub repository’s settings and paste this webhook.
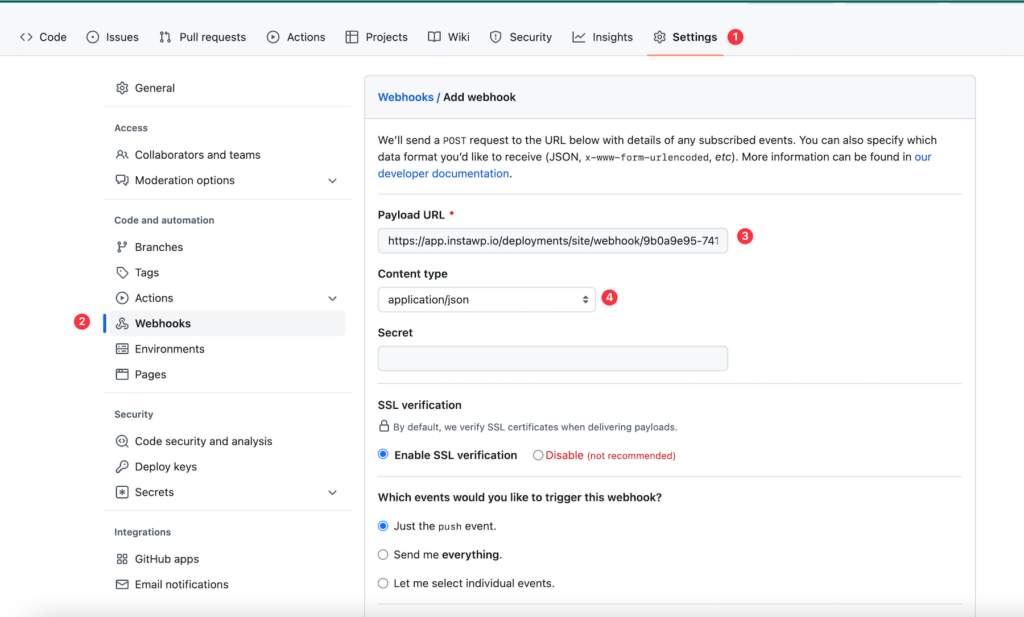
- Click on Settings
- Navigate to Webhooks
- Paste the webhook URL
- Select
application/jsonfrom the dropdown as Content Type.
Click on Add Webhook to save the form. At this point, your site is now linked to a GitHub repo, it is time to test this now!
Go ahead and commit any change to your repo, as an example shown below, I am just increasing the Plugin’s version number:
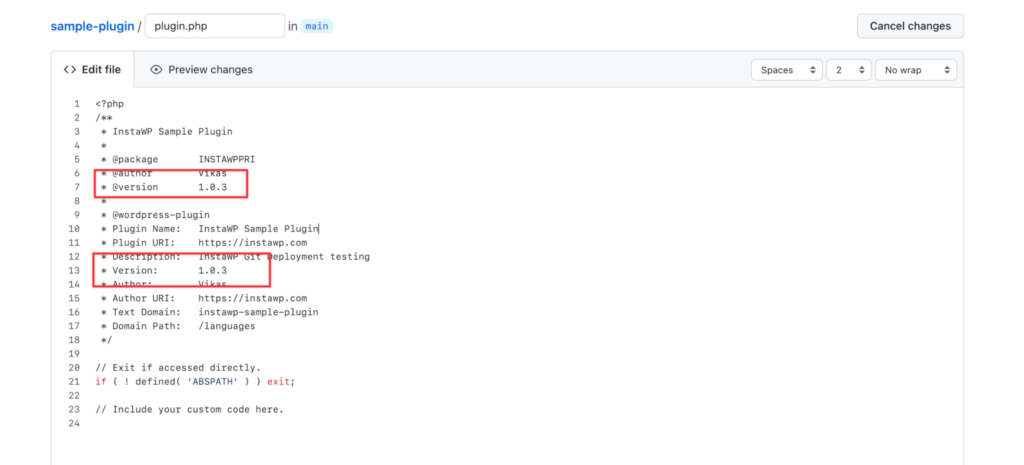
You will notice a new plugin has appeared in the WordPress admin panel, with this new version, go ahead and activate this plugin:
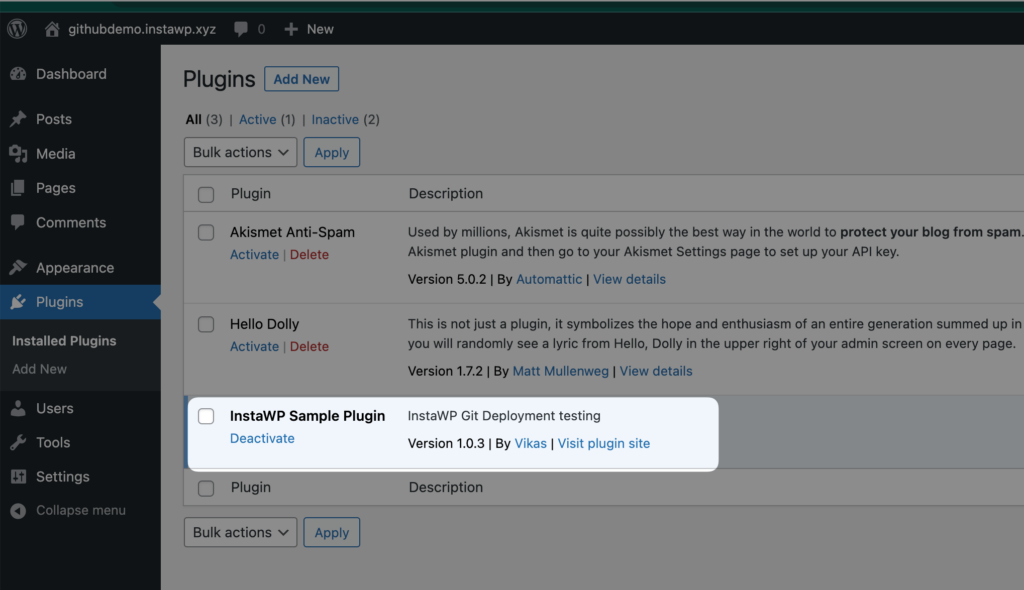
Now, any time you make a change to the main branch in your repo the changes will be reflected inside the Site immediately.
Link Repo to a Template
Next, you will learn how to save this Site as a Template and link the repository with that template. This will enable you to create multiple copies of the sites every time an update is available in the branch (via push or PR merge or even manually).
First, save the site as a Template:
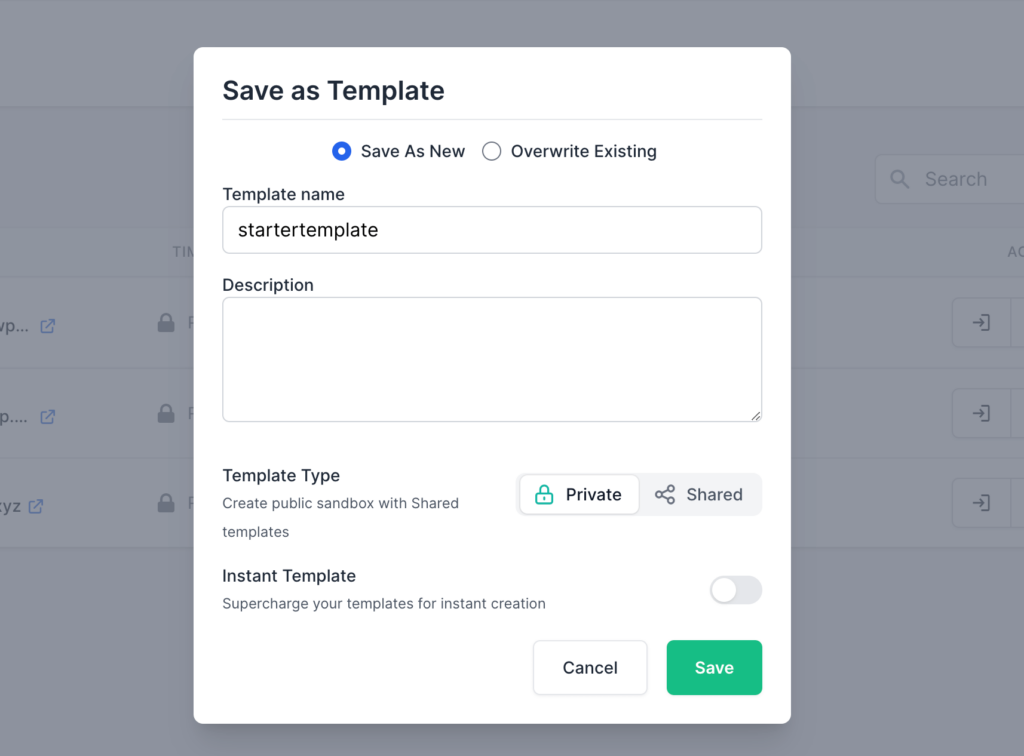
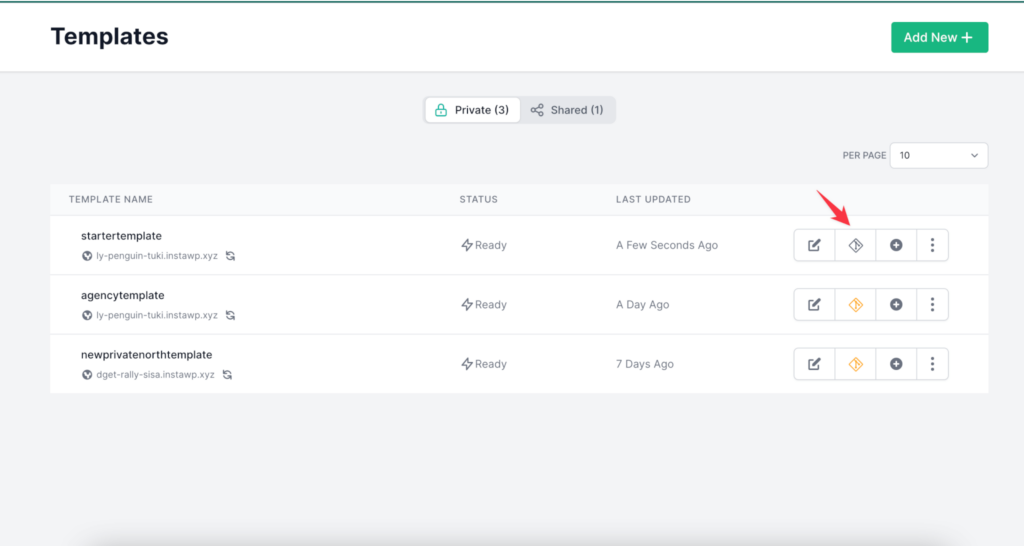
Next, link the template with the repo, similar to what you did with the site.
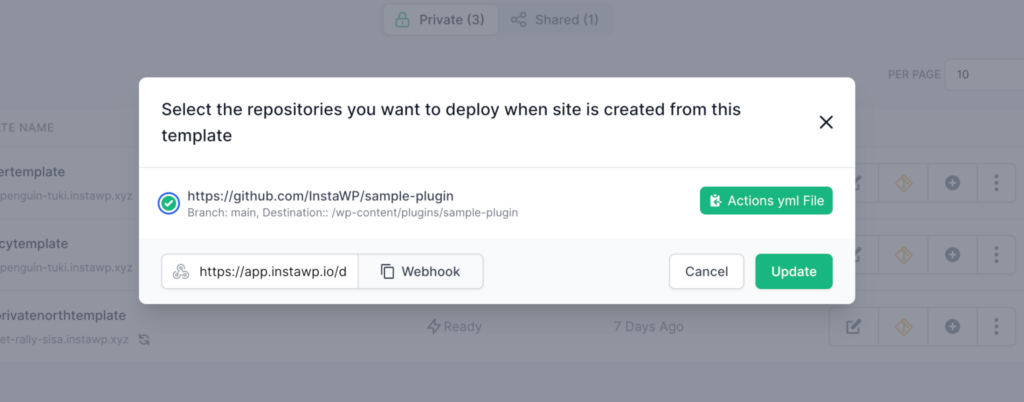
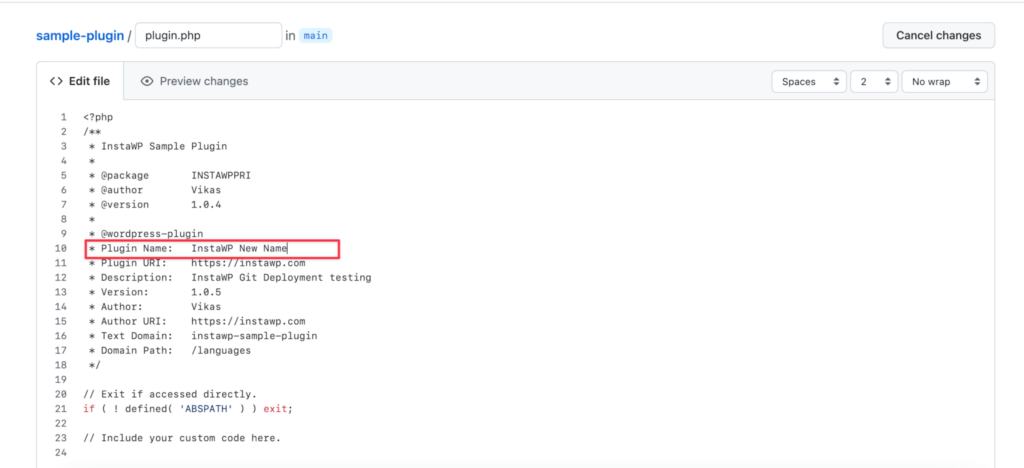
Now, try to make a change to the repo, this time, I am changing the text which is appended at the bottom:
Go back to your InstaWP dashboard, you will notice that there is a new site in the “Sites” tab.

Notice, it mentions that the Site is from a template and shows the name of the template as well. If you open the site in a new tab, you will see our change too.
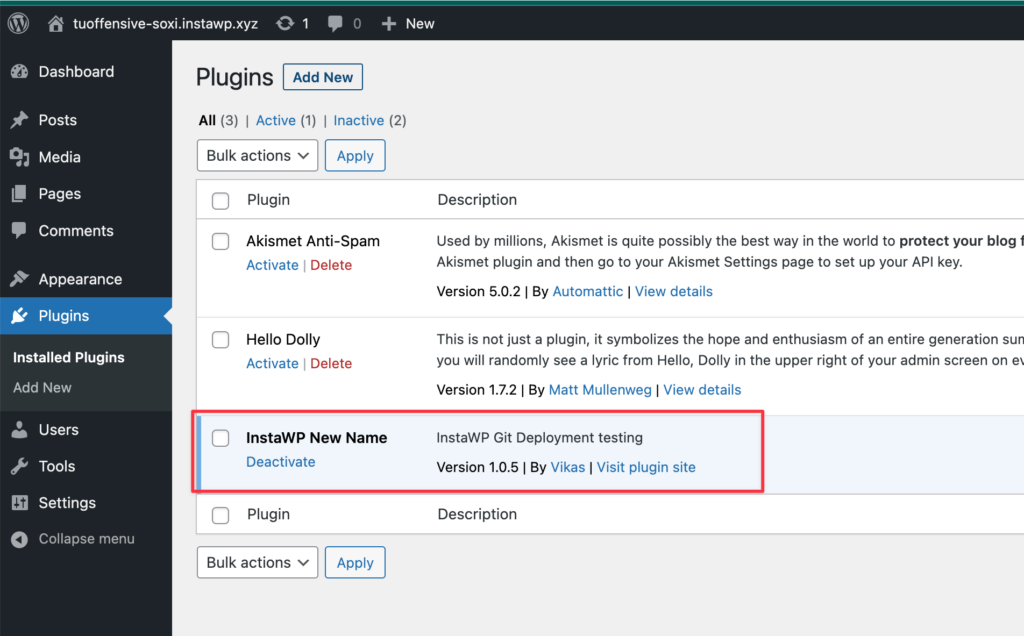
At this point, you have successfully linked your GitHub repo with a WordPress site & a template. Next, we will learn about doing this using Github actions:
GitHub Actions
The last bit of this article is about integrating Github actions with InstaWP. The goal is to create a new site every time there is a new Pull Request with all the contents + new version of the plugin (or theme or core).
Prerequisite:
- Create a site with content, theme, and plugins that you need when testing your plugin.
- Save the site as a template.
- Add a Git repo in Deployments.
- Connect the git repo to the template.
Note: All these steps are already listed in the article above.
At this point you can copy the Github actions YAML template when you are connecting the template with the git repo, for example:
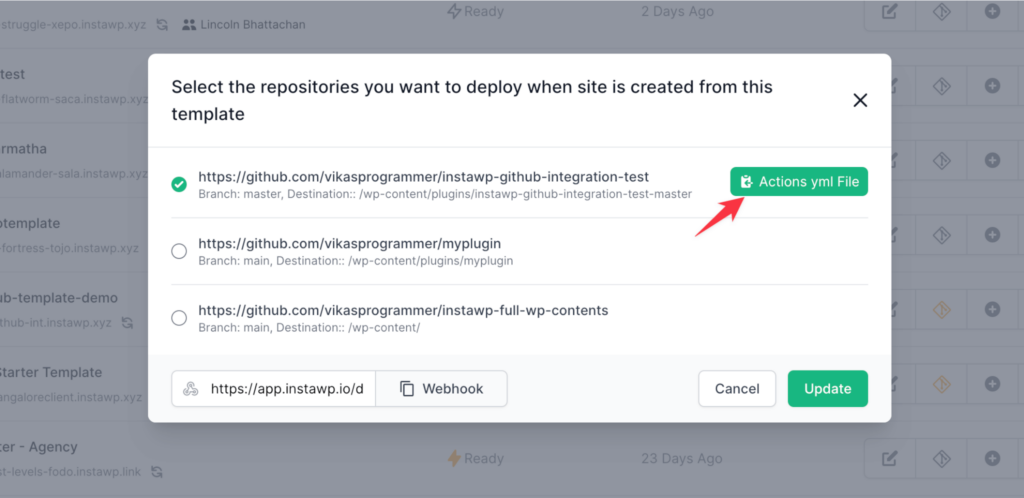
Yaml file will look something like this:
name: InstaWP WordPress Testing

on:
  pull_request:
    types: [opened]

jobs:
  create-wp-for-testing:
    runs-on: ubuntu-latest
    steps:
      - uses: instawp/wordpress-testing-automation@main
        with:
          GITHUB_TOKEN: ${{secrets.GITHUB_TOKEN}}
          INSTAWP_TOKEN: ${{secrets.INSTAWP_TOKEN}}
          INSTAWP_TEMPLATE_SLUG: github-template-demo
          REPO_ID: 3
INSTAWP_ACTION: create-site-template- GITHUB_TOKEN: This is an internal token passed by Github, you can leave it as-is.
- INSTAWP_TOKEN: Create an API key (read-write) and create an action secret with the same name. Paste the API key in that secret.
- INSTAWP_TEMPLATE_SLUG: Slug of the template
- REPO_ID: ID of the repo (Deployments tab).
- INSTAWP_ACTION: “create-site-template” means create a site, we also support “destroy-site-template” which will destroy the site.
More examples of Github action implementation can be found here:
- https://github.com/vikasprogrammer/instawp-github-integration-test/blob/master/.github/workflows/instawp.yml
- https://masterwp.com/integration-tests-wp-plugin-lando-instawp/
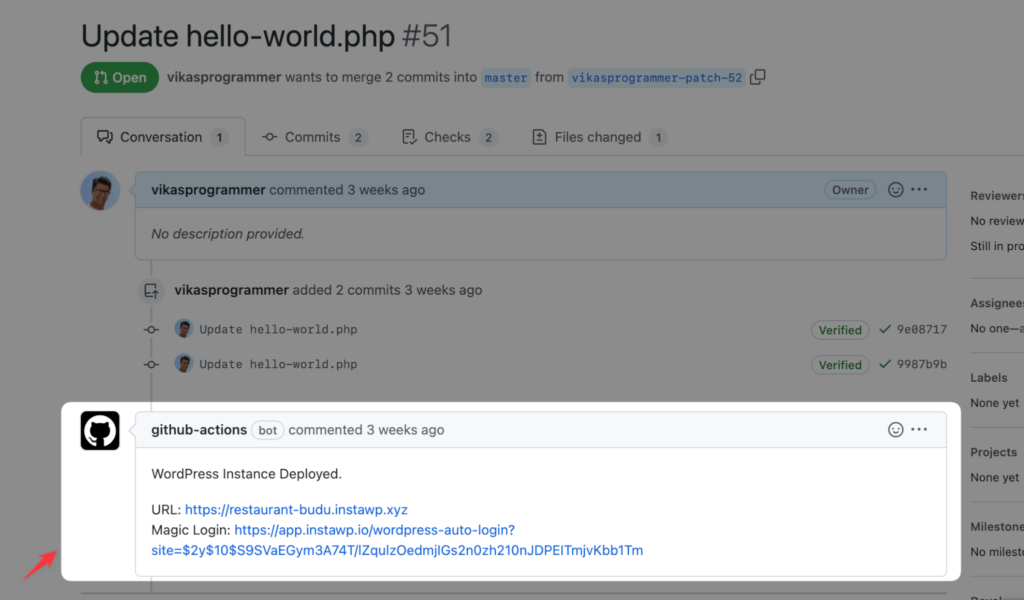
Once this is set, every time you raise a Pull Request (PR), a new instance of a WordPress site from the template will be created and added as a comment to the Github PR.
Conclusion
In today’s version control-based development environment, WordPress developers often struggle with a lack of tools. InstaWP’s WordPress git integration can revolutionize your workflow and save you significant time.
Start by creating a simple site and linking it with the repository. You can test this on a free plan with all features available, except the post-deployment commands. You are limited to 100 executions per month, which is more than enough for most projects.


