Knowing how to migrate or export your WordPress website is crucial if you want to move from one hosting provider to another or if you want to migrate your website from a local to a live server and even move your WordPress website from WordPress.com to self-hosted WordPress.org website.
There are many reasons why you need to export your WordPress website. For instance,
- You need a backup of your website.
- You are looking to move your website to a new host.
- You want to create a staging site.
- Moving from WordPress.com to WordPress.org.
However, if you are migrating a WordPress website for the first time, it might seem like a difficult task. But migrating WordPress is very simple if you know the correct method.
We will discuss three ways you can migrate your website in this article.
- Using the InstaWP Connect Plugin
- Using the WordPress built-in export feature
- Manually migrating your site with FTP and phpMyAdmin.
We will walk you through all three methods; you can use one of the methods to export a WordPress website.
Let’s Start.
Table of Content
- How to Migrate WordPress Website
- Method1: Using the InstaWP Connect Plugin
- Method2: Using the WordPress built-in export feature
- Method3: Manually migrating your site with FTP and phpMyAdmin
- Bonus: How to Export a WordPress Site From WordPress.com
- Conclusion
How to Export WordPress Website
We are going to look at all the method one by one so that you can choose the best way to migrate your WordPress website.
Method 1: Using the InstaWP Connect Plugin
InstaWP Connect is a great plugin available for free, that will help you create a staging site, and migrate and export your WordPress site. It will allow users to easily migrate their WordPress website from any local or live server to any other destination. InstaWP also creates a staging website that is great for testing and development.
You can export your entire site, including the entire database, theme, plugins, and media files in just a few clicks.
Before moving on, learn how to get started with InstaWP.
First you will need to install InstaWP Connect plugin on your WordPress website that you wish to export. After that, you will need to create a staging site. For that, go to InstaWP→ Staging Sites in the WordPress Admin dashboard. Now click on the Create New Staging Site button.
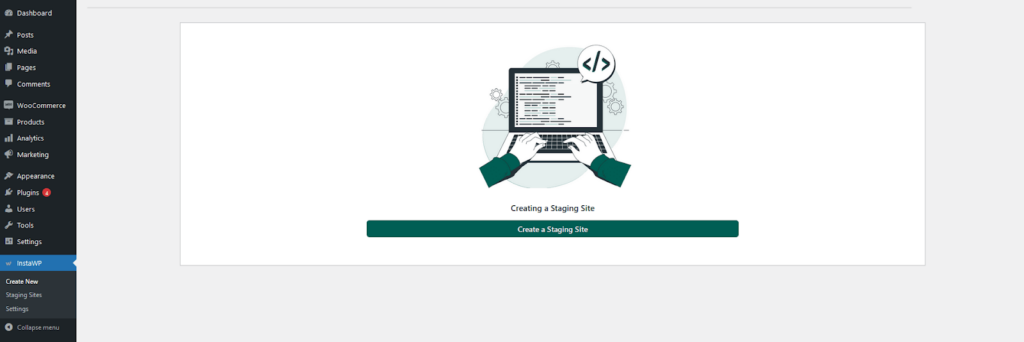
If you don’t have an account yet in InstaWP, you will be redirected to your InstalWP account where you can register using your email, Facebook, or Twitter account.
You need to connect your instaWP account with your WordPress site.

After a successful connection, you need to provide permission to InstaWP to access your WordPress site. Click on the Approve button.

Now you have to choose whether you want to create a staging site with or without copying the media files (images, files, folders)
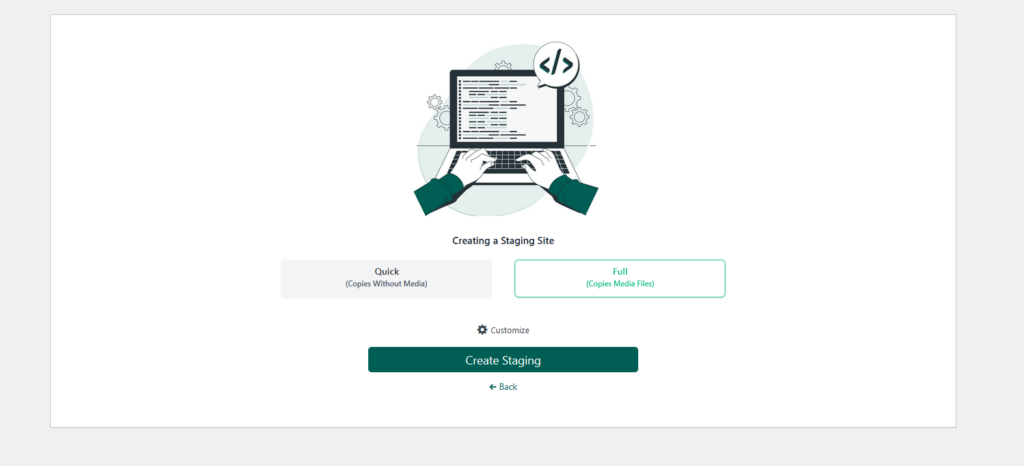
After a few minutes, your staging site will be ready and you can view that on your InstaWP account.
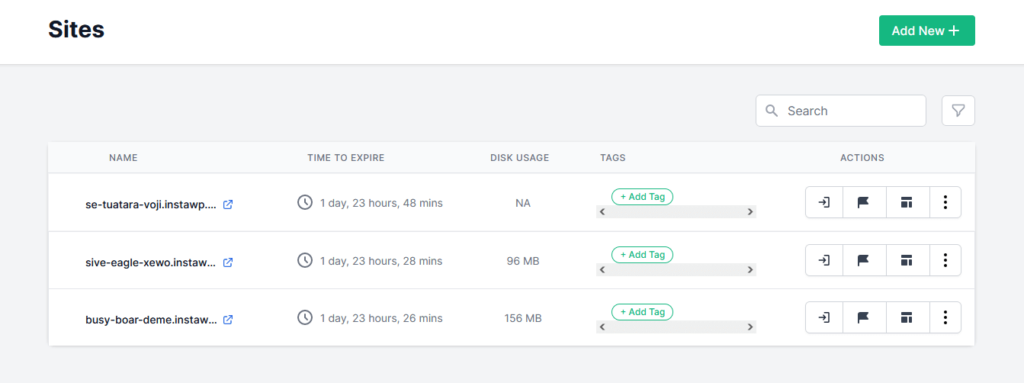
Now if you want, you can export your site to LocalWP. Just open the site and from the dropdown option click on Export -> LocalWP.
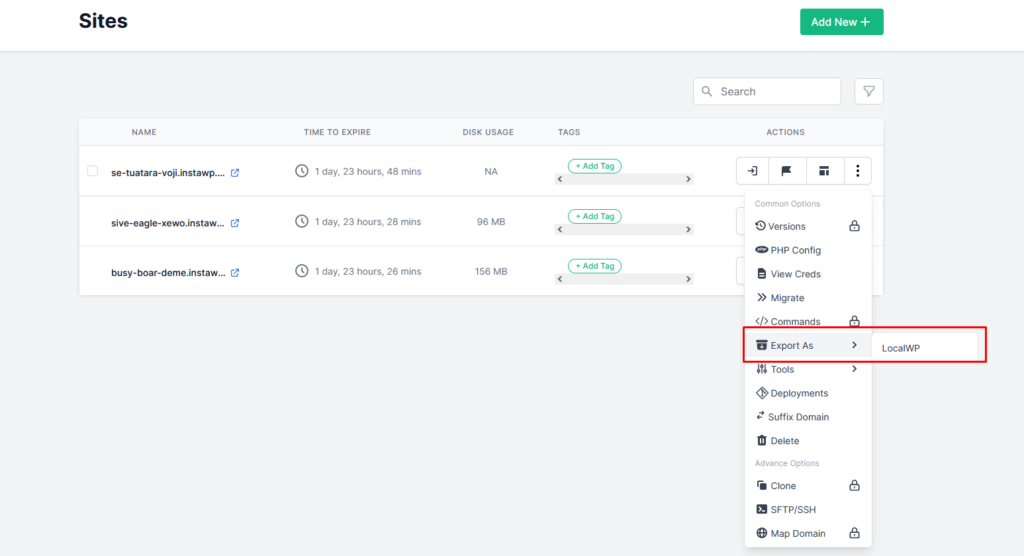
You will receive an email after a few minutes (depending on the size of your website) with a link to download the zip file.

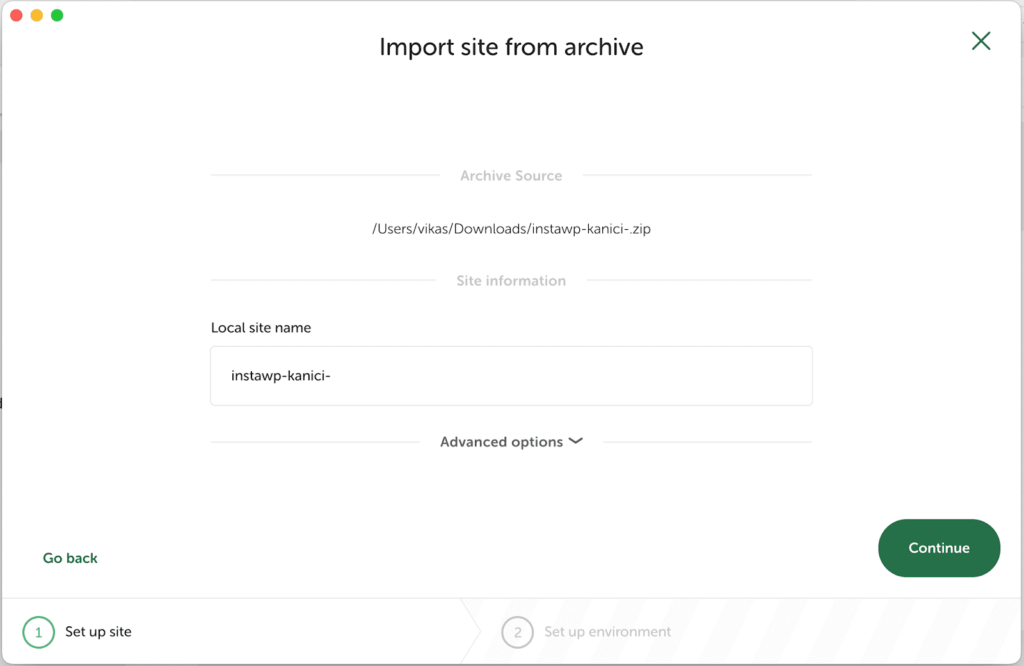
You can then drag and drop this zip to the LocalWP interface, something like this:
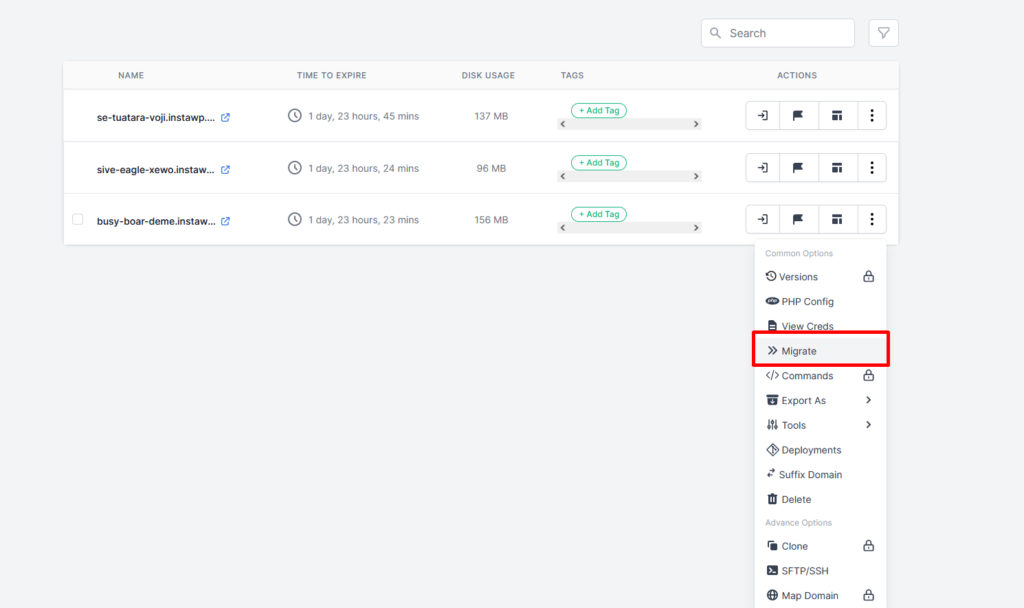
Also, if you want, you can migrate your WordPress site to any hosting provider. Just click on Migrate from the drop-down box,
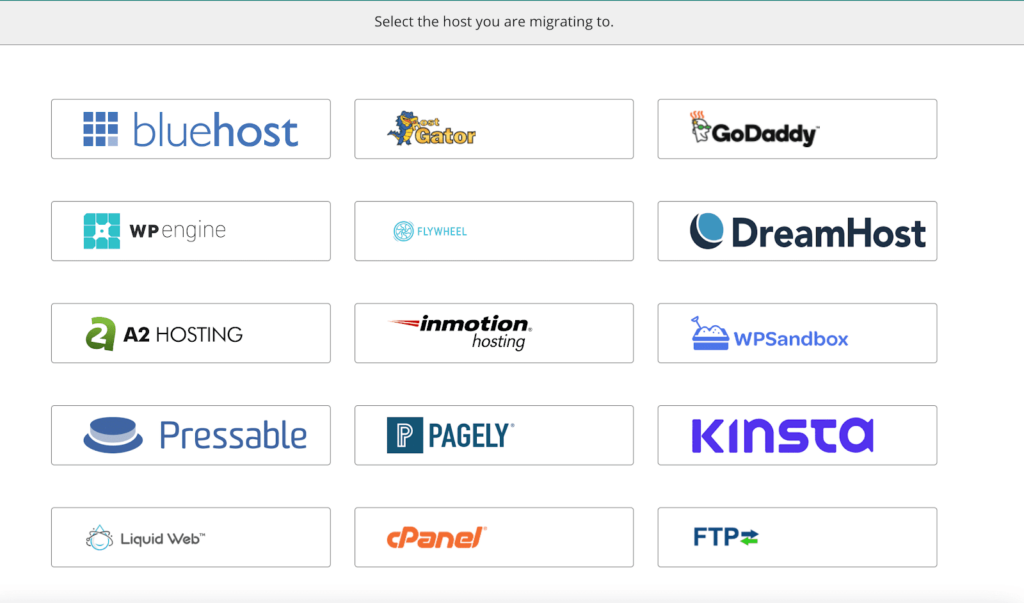
You will see the list of hosting providers you can migrate to. Select a hosting provider and enter details.
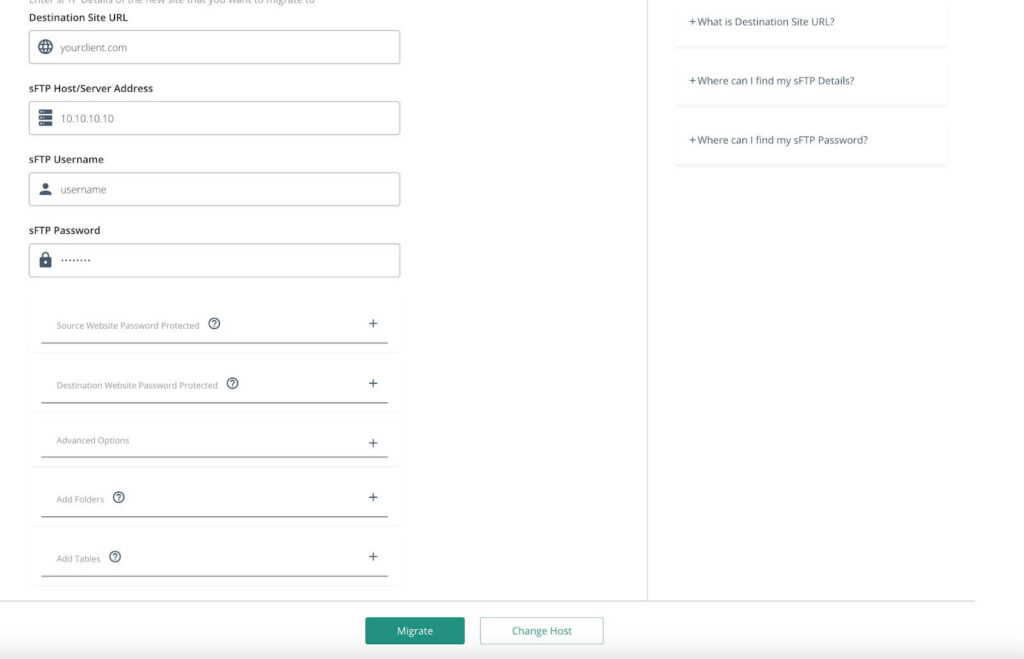
You need to ensure your target website is already created with a default WordPress installation, then enter the details of your target website. For example:
Learn more about the export feature f InstaWP from here. This is how to export a WordPress website using the fantastic InstaWP Connect.
Method 2: Use the WordPress built-in export feature
If you want to export using the built-in method of WordPress you can do that using the built-in feature. Log in to your WordPress site. Go to Tools > Export in the menu on the left.
Now choose All Content, or you can select the other options.

Click the Download Export File button. It will take some time for the export process to complete. When the file is ready with your exported content, you can save it as a XML file.
When you want to upload this exported file to a new site, log in to your new website’s WordPress admin. After that, go to Tools » Import.
You need to install the WordPress importer.

Then, click the ‘Run Importer’ link. On the next page, you have to select the exported file, then you have to click the ‘Upload file and import’ button.

You are done.
Method 3: Manually migrate your site with FTP and phpMyAdmin
This last method is not for beginners. Those who have technical knowledge in WordPress and server management can use this method to export WordPress websites.
Connect to your existing site’s server using FTP. To do this, you’ll need an FTP client like FileZilla, as well as a host, username, password, and port which are provided by your web host.
When you have all your details, enter the credentials and click on Quickconnect
. 
After a successful connection, you will see multiple folders on the right-hand side of FileZilla’s interface. Find your site’s root folder, labelled public_html. This is the place where the site’s files are stored.
Now you can drag and drop any content from your server to your local computer:

In order to migrate or back up your full site, highlight everything in the public_html directory and drag it to your local computer.
To export your database, you’ll need to use phpMyAdmin. You will find access through your hosting account. It’s available under Databases of your control panel:

Under phpMyAdmin, you need to find the Export tab. Then select any preferred method. Choose SQL as the format, then click on the Go button:

Now you can download your database. You can upload it to your new WordPress site or keep it as a backup.
These are the methods you can use to learn how to export WordPress websites with ease.
Bonus: How to Export a WordPress Site From WordPress.com
Nowadays, people are looking to switch from WordPress.com to a self-hosted WordPress.org, as it provides more customization options and access to your data. The process is very simple.
Login to your WordPress.com account and navigate to the Tools » Export page in your admin area.
Here, you need to click the ‘Export all’ button to export your text content. You will export pages, posts, and feedback.
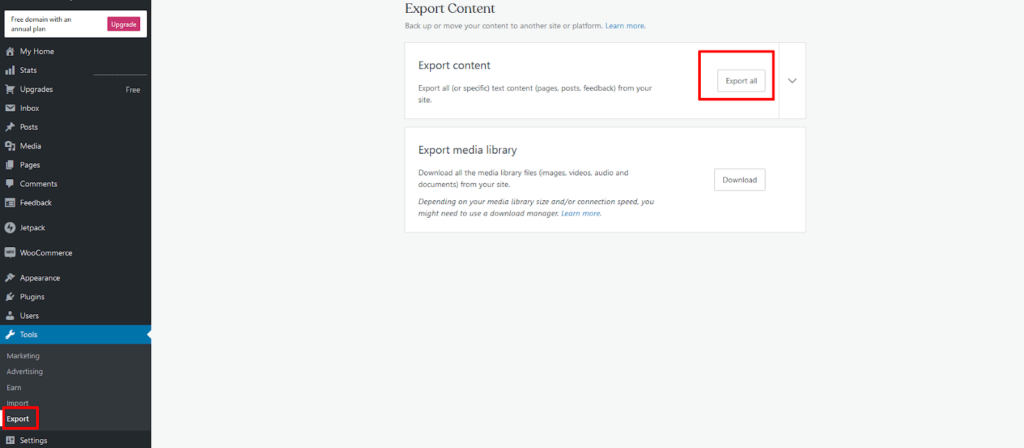
You will see a download link for your export. Click the button to download the exported files to your computer.

You can then upload this file to another WordPress site, just go to the Tools » Import feature for importing that site.
Final Word
Accidents can happen at any time. Specifically with your websites. So it is smart to have a backup of your website. With InstaWP you can create a staging site that can serve as a backup or a test website.
Exporting a WordPress website is easy and there are multiple ways that you can use to migrate your website. We have given you three methods to export your WordPress website. Follow them thoroughly and find the one you are most comfortable with.


